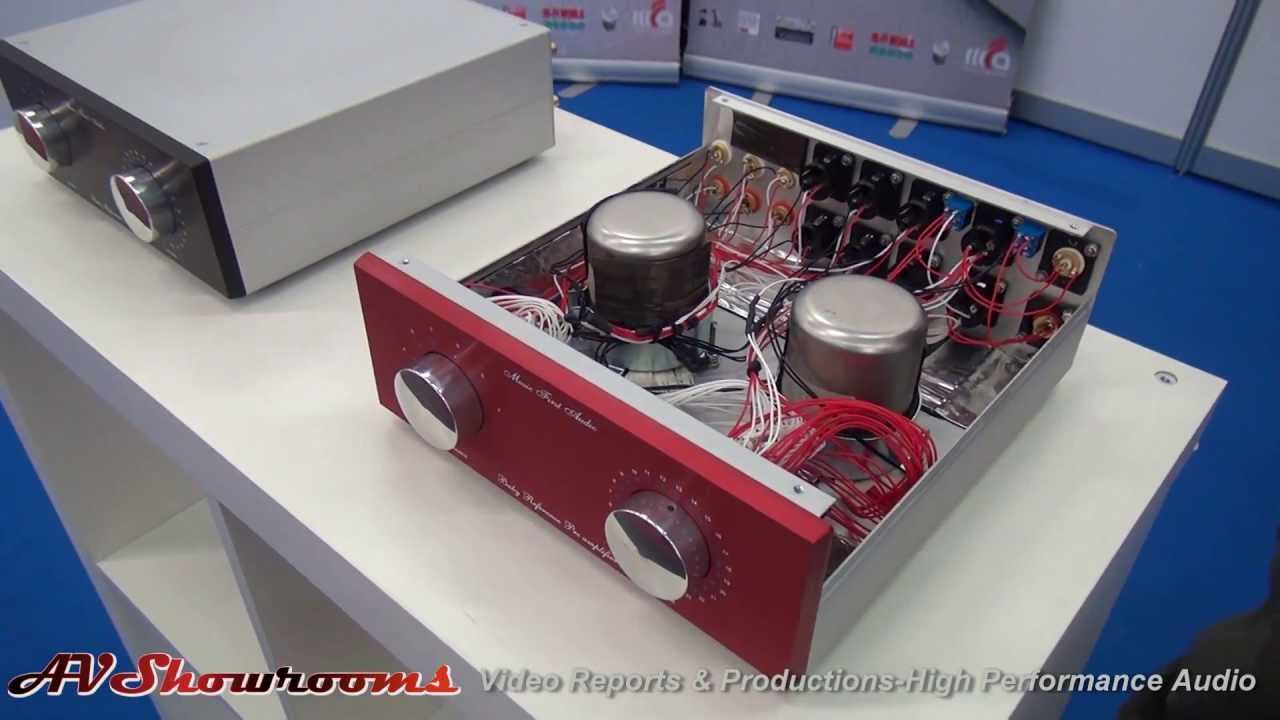
2. Front DAW
by: United Plugins
![]()
https://youtube.com/watch?v=bwrvLyK1pXk
Turn Your DAW Mixer into an Analogue Desk
The digital world with its clarity and accuracy sometimes lacks some of the vibe from the old times. This is why English producer and remixer Greg Brimson approached United with his idea for a dream plugin. ‘Create a front door for every recording, and call it Front DAW. So that every track would have a true analogue input.’ Thanks to him you can turn your DAW Mixer into a real Analogue Console.
Every Track Different with VARM
Take advantage of United Plugins’ Variable Analogue Random Modeling technology. VARM is technology based on knowledge of chaotic behaviour and randomness of the analogue world. Thanks to VARM, each plugin instance acts slightly different. VARM models randomness of the subtle differences of the values of the electrical parts – exactly as is the case in the real electrical units and real console channels.
Three Types of Saturation
BR/US/GE buttons represent three types of analogue circuits you may choose from. BR represents classic fat British consoles, US stands for legendary punchy American style input. Switching to GE will give you velvet sounding colourful vintage German tube console.
The Mojo
Turning the Mojo knob lets you decide the amount of saturation your tracks get. The effect is rather subtle and gentle because Front DAW is intended to be used on many tracks simultaneously.
Saturate Every Track
Thanks to advanced modelling technology, Front DAW is very CPU-friendly. It is designed to be used on every single track of your mix (if desired).
Hassle-Free Software Protection
No iLok, no dongle or internet access is required for activation. This software uses licence files to activate your software. You can freely use the purchased software on all your computers as long as you are the user.
Realistic 3D Yet Flexible GUI
The photorealistic graphic user interface of the plugin gives you the feeling you are touching the real hardware. You can always drag the arrow in the bottom right corner to change its size – make it smaller to save the valuable screen space, or enlarge it to make it easier to use.
15-Days Unlimited Trial Version for Free
All the descriptions are nothing compared to putting hands on the plugin yourself. No saving limits. No noises. No boundaries. Engage the plugin in your project and fully exploit its powers for two weeks.
64-bit Audio Quality at ANY Sampling Rate
The plugin provides the maximum audio quality you can get. It uses internal 64-bit audio processing and can handle any sampling rate. 192 kHz or even higher.
Smart Bypass
The intelligent way this plugin manages bypassing ensures that you don’t get any clicks or harmful noises when automating the parameter.
System Requirements
Mac
- macOS 10.10 and later (M1 Silicon Mac and macOS 11 Big Sur supported)
- 64bit only
- Intel/AMD processor with SSE2 support
- VST2, VST3, AAX or AU compatible host
Windows
- Windows 8 – 10
- 32bit or 64bit
- Intel/AMD processor with SSE2 support
- VST2, VST3 or AAX compatible host
Buy
Reviews
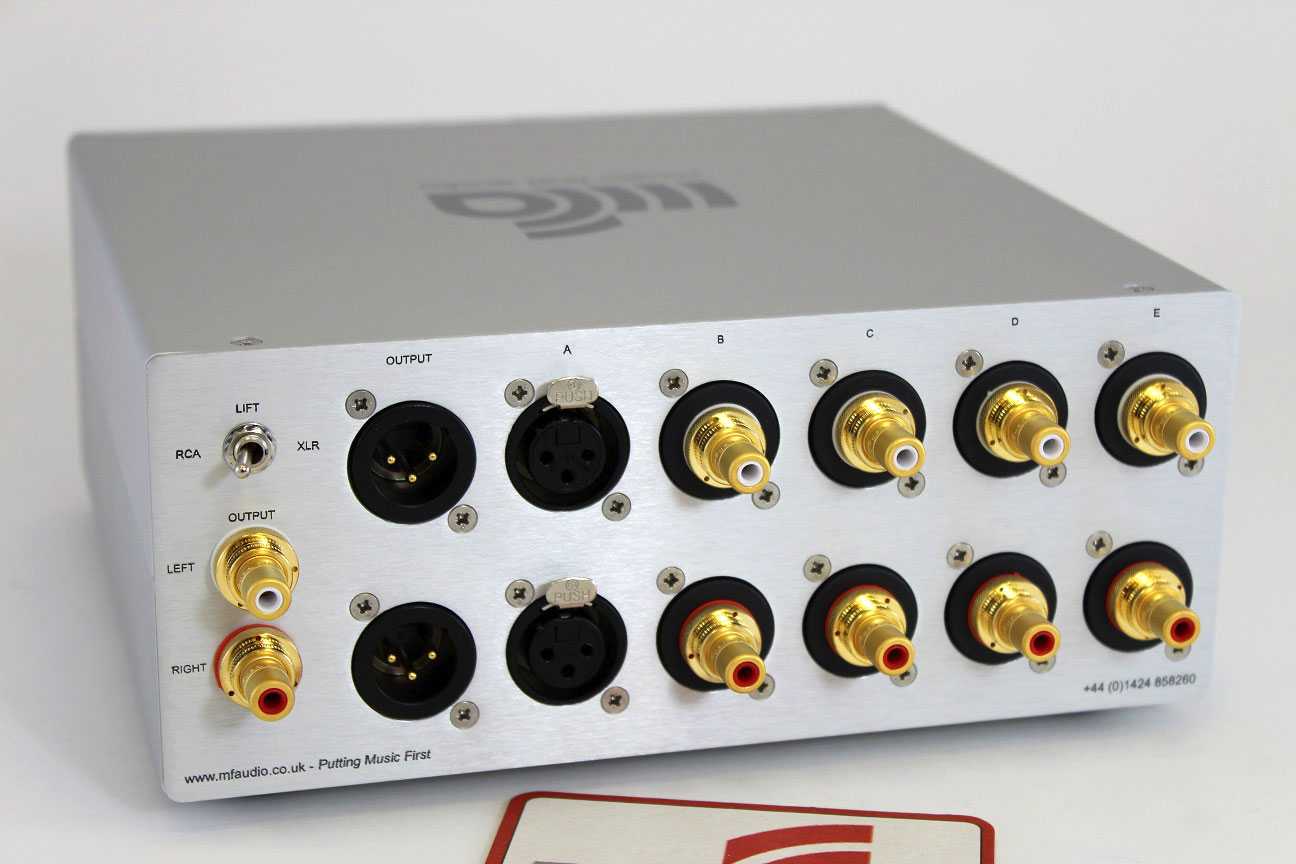
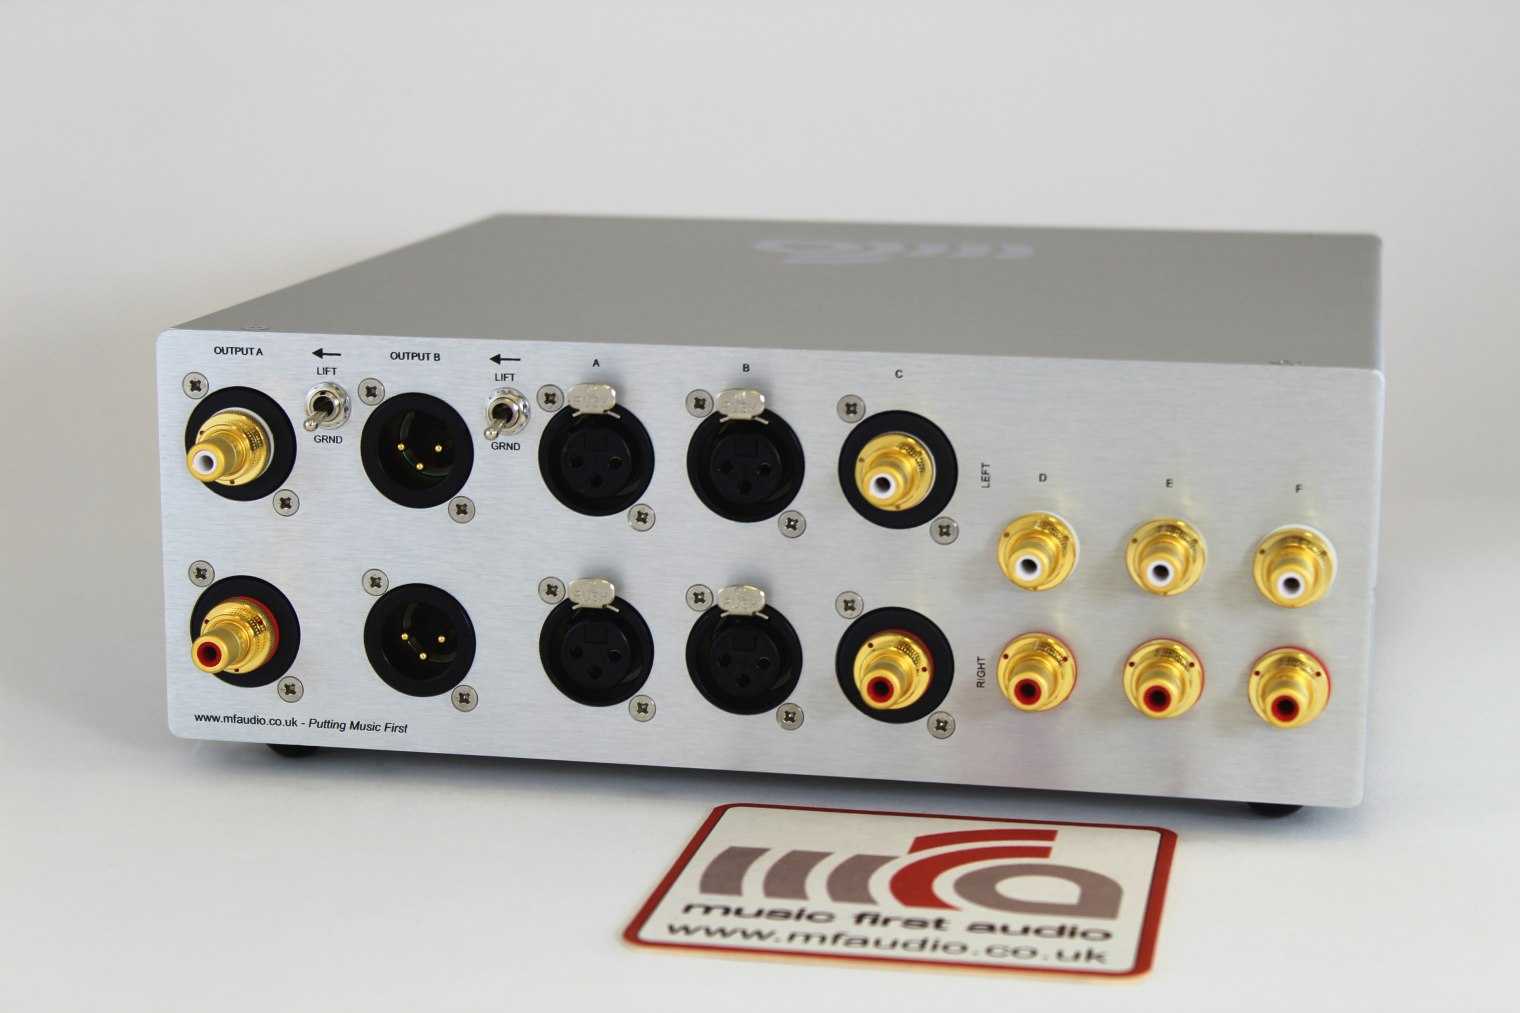
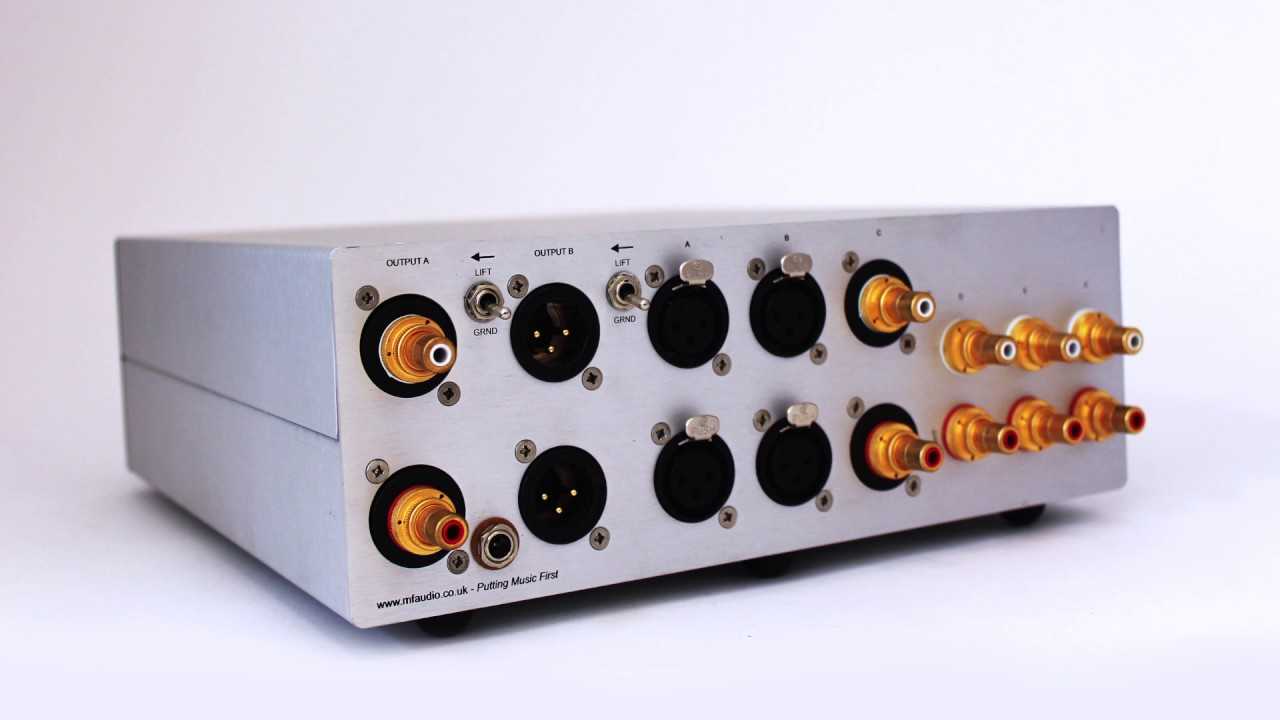
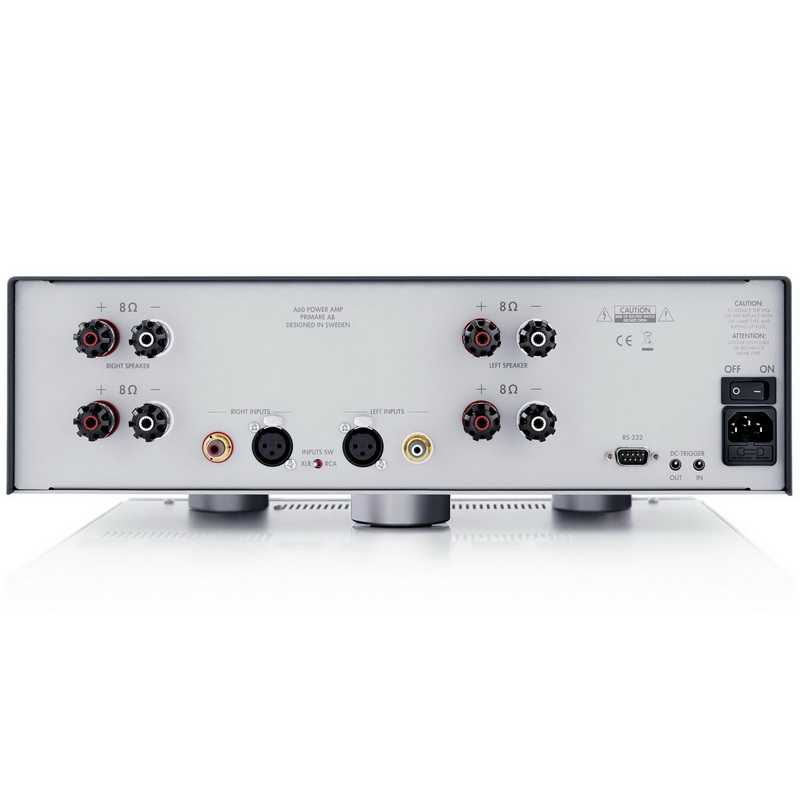
Analog Outputs
1/2 XLR
- Output level switchable +24 dBu, +19 dBu, +13 dBu, +4 dBu @ 0 dBFS
- Signal to Noise ratio (SNR) @ +13/19/24 dBu: 120 dB RMS unweighted, 124 dBA
- Signal to Noise ratio (SNR) @ +4 dBu: 117 dB RMS unweighted, 120 dBA
- Frequency response @ 44.1 kHz, -0.1 dB: 0 Hz – 20.2 kHz
- Frequency response @ 96 kHz, -0.5 dB: 0 Hz – 44.9 kHz
- Frequency response @ 192 kHz, -1 dB: 0 Hz – 88 kHz
- Frequency response @ 384 kHz, -1 dB: 0 Hz – 115 kHz
- Frequency response @ 768 kHz, -3 dB: 0 Hz – 109 kHz
- THD @ 0 dBFS: < -120 dB, 0.0001 %
- THD+N @ 0 dBFS: -115 dB, 0.00018 %
- Channel separation: > 110 dB
- Output impedance: 200 Ohm
1/2 TS (rear)As output XLR, but:
- Output: 6.3 mm TS jack, unbalanced
- Maximum output level: +19 dBu
- Signal to Noise ratio (SNR) @ +19 dBu: 120 dB RMS unweighted, 123 dBA
- Signal to Noise ratio (SNR) @ +13 dBu: 118 dB RMS unweighted, 121 dBA
- Signal to Noise ratio (SNR) @ +4 dBu: 115 dB RMS unweighted, 118 dBA
- Output impedance: 100 Ohm
Phones 1/2As Output 1/2 TS, but:
- Output: 6.3 mm TRS jack, unbalanced, stereo
- Output impedance: 0.1 Ohm
- Signal to Noise ratio (SNR) @ +22 dBu: 120 dB RMS unweighted, 123 dBA
- Signal to Noise ratio (SNR) @ +7 dBu: 118 dB RMS unweighted, 121 dBA
- Output level at 0 dBFS, Ref Level +19 dBu, load 100 Ohm or up: +22 dBu (10 V)
- Output level at 0 dBFS, Ref Level +4 dBu, load 8 Ohm or up: +7 dBu (1.73 V)
- THD @ +18 dBu, 32 Ohm load, 1.2 Watt: -110 dB, 0.0003 %
- THD+N @ + 18 dBu, 32 Ohm load: -107 dB, 0.00045 %
- THD @ +14 dBu, 16 Ohm load, 0.94 Watt: -110 dB, 0.0003 %
- Max power @ 0.001% THD: 1.5 W per channel
Output Phones 3/4As Output Phones 1/2, but:
Output levels at 0 dBFS: Hi-Power off +7 dBu, Hi-Power On +22 dBu
Balanced Phones modeAs before, but:
- Output levels at 0 dBFS: Hi-Power off +13 dBu (3.46 V), Hi-Power On +28 dBu (19.5 V)
- Output impedance: 0.2 Ohm
- Signal to Noise ratio (SNR) @ +28 dBu: 123 dB RMS unweighted, 126 dBA
- Signal to Noise ratio (SNR) @ +13 dBu: 121 dB RMS unweighted, 125 dBA
- Output level at 0 dBFS, Hi-Power On, load 150 Ohm or up: +28 dBu (19.5 V)
- Output level at 0 dBFS, Hi-Power Off, load 8 Ohm or up: +13 dBu (3.46 V)
- Max power @ 0.001% THD: 2.9 W per channel
Analog Inputs
XLR
- Input: XLR, servo-balanced
- Input sensitivity switchable +24 dBu, +19 dBu, +13 dBu, +4 dBu @ 0 dBFS
- Digital Trim Gain range: 0 dB up to +6 dB
- Signal to Noise ratio (SNR) @ +13/19/24 dBu: 120 dB RMS unweighted, 124 dBA
- Signal to Noise ratio (SNR) @ +4 dBu: 119 dB RMS unweighted, 123 dBA
- Frequency response @ 44.1 kHz, -0.1 dB: 5 Hz – 20.5 kHz
- Frequency response @ 96 kHz, -0.5 dB: 3 Hz – 45.5 kHz
- Frequency response @ 192 kHz, -1 dB: 2 Hz – 92.7 kHz
- Frequency response @ 384 kHz, -1 dB: < 1 Hz – 124 kHz
- Frequency response @ 768 kHz, -3 dB: < 1 Hz – 180 kHz
- THD @ -1 dBFS: -116 dB, 0.00016 %
- THD @ -10 dBFS: -125 dB, 0.000056 %
- Channel separation: > 110 dB
TRSAs input XLR, but:
Input: 6.3 mm TRS jack, servo-balanced, fully compatible to TS and RCA
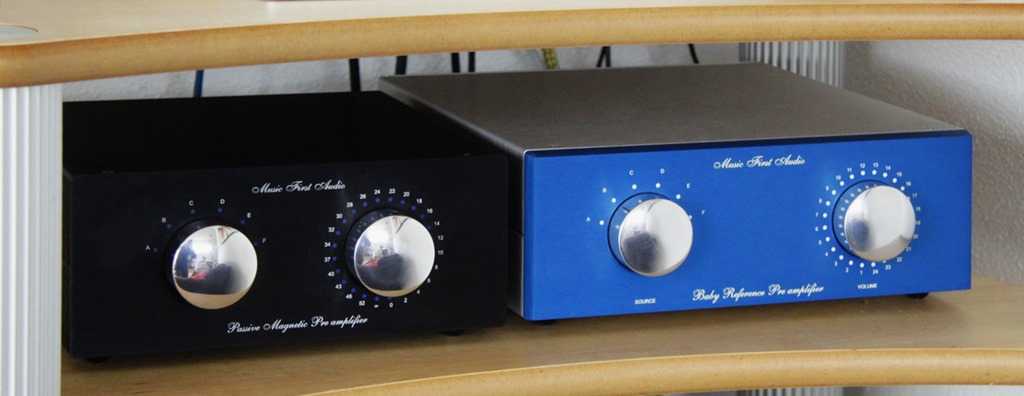
7. CS1V Console Channel
by: Mellowmuse
![]()
CS1V brings the warmth and depth of an analogue console to your tracks and mixes. Drive increases the level of saturation. Tone adjusts pre-amp character; darker and heavier in the low range anti-clockwise, and progressively brighter high-end harmonic boost clockwise. There are two selectable preamp modes: A is darker in character overall, while B has a flatter frequency response.


The default “Channel” mode is intended for mono tracks. When inserted on stereo tracks or aux, the “Buss” setting can be used to add a subtle amount of crosstalk, as in a hardware mixer. Engaging the automatic gain control (AGC) attenuates the output to match the source volume.
The Group control allows all instances with the same number to be controlled as a group, making ensemble changes easy.
Features
- Variable input drive and preamp tone.
- Phase switch.
- VU metering.
- 4x oversampling.
- Control multiple instance groups.
- 64bit internal processing.
System Requirements
- Windows 10 or above
- Mac OSX 10.9 or above
- 64-bit only
- VST, VST3, AU and AAX
Buy
Reviews
Write your review and rate this rating The Best 7 Preamp VST Plugins
![]()
Top 7+ Preamp VST Plugins 2022
SOUND QUALITY
97
VALUE FOR MONEY
97
EASE OF USE
97
FEATURES
99
PRESETS
99
Reader Rating50 Votes
95
98
Nobu K.Shishido, Glass Audio Vol.9/97
Минуло только три года с момента появления моей статьи «Transformer Coupled WE-300B,
Single-Ended Amp» (GA 1/94), которая, я полагаю, стала первой по данному типу усилителя в этом
журнале. Как я был поражен, увидев череду однотактников на зимней выставке WCES’96 в Лас Вегасе,
где прежде героями ходили транзисторные монстры. Мне трудно было поверить, что американские
аудиофилы способны воспринять DHT-SE* ничтожной мощности даже после того, как издатель Glass Audio
Эдвард Делл (Ed. Dell) подбил меня написать что-либо об audio в Японии и особенно об однотактниках.
Мне известно, что Jean Hiraga**, живший в Японии одно время, в своих статьях защищал японский
audiocraib — DHT-SE и рупорные громкоговорители. Сейчас он работает во Франции и в Европе его
деятельность довольно популярна. Но в Америке? Стране гигантских мощностей и гигантского всего
остального. Я был крайне скептично настроен. Однако, реакция читателей на мои письма в GA
заставила внонь обратиться к теме, что именуется мистическим японским аудиосообщестзом.
Сама выставка WCES’96 и многочисленные ревю о DHT-SE в журналах убедили меня в том, что тема
однотактников воспринята в Америке с энтузиазмом, запредельным для моего понимания. Только теперь
я исполнен вдохновением большим, чем когда-либо, писать об однотактниках.
High Resolution Display Operation
RME have incorporated many unique features, not found on any comparable devices, like 5-band parametric EQs for fully individual phones compensation, adjustable Bass/Treble controls with quick access, a binaural crossfeed function, adjustable loudness filter, selectable AD/DA filters, four discrete I/O reference levels, auto reference level setting, auto balanced phones mode, and many more. The display is not only used to control the unit, but also shows warning and guidance messages.
Professional features such as M/S Processing, stereo width and phase reversal up to full control and storage of all settings are included, as well as RME’s famous Spectral Analyzer, a 30-band biquad filtered analysis tool offering unprecedented musical visualization, perfectly complementing the high-resolution IPS display.
https://youtube.com/watch?v=rEGwB88U8fI
1. Pre X7
by: Audiority
![]()
https://youtube.com/watch?v=ER-WlCHSjX0
Pre X7 is an analog modelled preamplifier based on an iconic vintage tube unit primarily designed for bass guitar and that we modified to make it work with several audio sources. Both input and output 12AX7 tube models are calculated in real-time, bringing you all the subtle non-linearities that will make each instance of this plugin unique without phase issues. A high-pass filter followed by a Tone control lets you shape the input signal before the output tubes. Furthermore, we included a brickwall clipping limiter to help you retain the distortion on extreme settings.
Features
- Real-time 12AX7 tube models
- 4 steps Low Cut (pre or post input tube)
- Input/Output Linking
- Baxandall tone control
- Boost, Pad and Phase switches
- Brickwall clipping limiter
System Requirements
Mac (Intel)
- OSX 10.8 or later (64-bit only)
- Intel i5 or higher
- 2GB RAM
- Screen resolution: 1024×768
- VST2, VST3, AU 64-bit host
- AAX 64-bit host (Pro Tools 11 or higher required)
Mac (M1 Apple Silicon)
- macOS 11.0 or later (64-bit only)
- Apple M1 or higher
- 2GB RAM
- Screen resolution: 1024×768
- VST2, VST3, AU 64-bit host
- AAX 64-bit host (Pro Tools 11 or higher required)
PC
- Windows 7 (64-bit only)
- Intel i5 or higher
- 2GB RAM
- Screen resolution: 1024×768
- VST2, VST3 64-bit host
- PT11 or higher, AAX 64-bit host
Important Note: This software is 64-bit compatible only and will not function on 32-bit systems.
Buy
Reviews
Покупка преампа для торопыг
Выбираем преамп — на что смотреть
Как некоторые песни могут сочетать в себе разные жанры, так и звуковые качества и области применения разных преампов могут пересекаться. Рассмотрим некоторые общие принципы, которые позволят вам сузить поиск.
По виду звука:
- Я хочу богатый, жирный звук — берем ламповый преамп
- Я хочу «окрашенный» звук, который вышибет на хрен динамики — берем транзисторный трансформаторный преамп
- Прозрачность и аккуратность прежде всего — берем транзисторный бестрансформаторный
- Во первых, хорошая атака и аккуратность, во-вторых, возможность добавить «теплоты» — берем гибридный, моделирующий преамп
- Хочу как можно больше тонового разнообразия — берем гибридный, моделирующий или любой преамп с переменным входным сопротивлением и регуляторами тембра
По области применения:
- Я записываю тяжелый рок и поп-вокал. Я хочу добавить характерности — берем ламповый или транзисторный трансформаторный преамп
- Я записываю электрогитары и бас-гитары — берем любой преамп. Прочитайте пп. 1-5 выше, чтобы понять что вам ближе. Одноканальный преамп подойдет; желателен еще высокоомный инструментальный вход. Также хороши специальные инструментальный преампы и DI-боксы.
- Я записываю перкуссию и оверхеды для ударных — двухканальный транзисторный; трансформаторный, если вы согласны с п.2 выше, бестрансформаторный, если согласны с п. 3 и гибридный — если с п.4
- Я записываю крутых вокалистов, оркестры и живой джаз. Я хочу максимальной жизненности и правдоподобности — берем транзисторный бестрансформаторный двухканальный или мультиканальный преамп.
- Я записываю микрофоны для ударной установки — берем 4-х (бочка, рабочий, оверхеды) или 8-ми канальный транзисторный преамп с цифровым выходом ADAT-lightpipe или аналоговым D-sub.
- Я хочу записывать мою группу живьем — берем мультиканальный транзисторный преамп с возможностью соединения в каскад.
- Я просто записываю мой голос и акустическую гитару — берем двухканальный преамп. Подойдет любой из вышеописанных типов, ваши уши разберутся.
- Я записываю электронные клавишные — клавишные можно записывать напрямую, но если вы хотите «окрасить звук» — выбирайте стерео-преамп, ламповый или транзисторный трансформаторный. Большинство клавиш имеют моно-выход, но стерео преамп даст вам преимущество при записи стерео-пресетов.
Выбираем марку вашего преампа
Чтобы помочь вам выбрать, мы разделили «окрашивающие» и прозрачные преампы/канальные обработки по самым известным производителям. Однако, некоторые производители могут изготовлять преампы, попадающие в обе категории. Некоторые фирмы специализируются только на ламповых или только на транзисторных приборах, но мы не будем разделять их по этому принципу. Мы также включили раздел «бюджетные преампы». Честно говоря, принцип «доступный/недоступный» более известен чем «прозрачный/окрашивающий». Нижеприведенные производители делают приборы, попадающие в обе категории, и, даже дешевые преампы могут показывать удивительно хороший результат. Удачной охоты!
Преампы/канальные обработки
| Прозрачные | Окрашивающие | Прозрачные и окрашивающие |
|---|---|---|
|
|
|
Гитарные и басовые преампы
| Электрогитары | Электроакустические гитары | Бас-гитары |
|---|---|---|
|
|
|
Некоторые ошибочные понятия
![]()
Вывод R. Welch’a о том, что межкаскадный трансформатор должен инвертировать фазу сигнала, к
сожалению, ошибочен***. Полярность не должна быть перевернута, если трансформатор используется
нормальным образом: начало (или конец) первички подключено к аноду драйвера,начало (или конец)
вторички — к сетке выходной лампы. Но не наоборот! То есть, не путать начала и концы обмоток,
подключенных непосредственно к лампам.
То, что он считал нормальным соединением, на самом деле; являлось инверсным включением
(возможно напутал начало и конец обмотки во вторичке), так как 2 % гармоник при 2 Вт — слишком
много для 300В в тех режимах, которые Reid описал. Как видно из рис. 2,искажения 300В при 2 Вт
выходной мощности чуть больше 1 % и никогда не достигают 2 % (2 Вт), пока какие-либо детали,
включая лампы, не окажутся негодными. Либо это ошибка в схеме, как в случае с перевернутыми
выводами у межкаскадного трансформатора.
Одно предостережение: лампа с зеркальной характеристикой передачи относительно выходной,
не обязательно является лучшей по звуку. Хотя я не могу указать на серьезные результаты
исследований, подтверждающие мою веру, я с крайним недоверием отношусь к тому,что кто-либо
способен отметить разницу между 0,35 % и 0,8 % искажений на 1 Вт, или 1 % и 3 % на 8 Вт (рис.
2), когда доминируют гармоники низких порядков, главным образом вторая. Внимательное прочтение
труда Russell’a Harnm’a «Tubes vs. Transistors — Is There an Audible Differences?» поддерживает
эти сомнения. Мои эмпирические поиски подтверждают, что природа и качество элементов — ламп,
трансформаторов и т. д. или комбинация их — создают более значительную разницу по звучанию,
нежели формальное отличие в % искажений. Я нахожу, что слишком часто люди отмечают различия,
имея тому причиной лишь величину гармоник.
Другая незначительная ошибка в статье R. Welch’a требует уточнения. При расчете мощности
рассеяния на аноде в отсутствие сигнала (при усилении в классе — А), Е измеряется между катодом и
анодом лампы. Тогда, в моей старой схеме за 1/94 Е должно быть равно 365 V (445-30) при токе
Iр= 90 mА, что означает мощность рассеяния 33 Вт. При произвольном выборе точки максимальных
искажений в 5 % на 10 Вт выходной мощности, эффективность анода моей 300В равна 30 %, не 25 %,
при этом она не «шипит» на максимуме рассеяния 40 Вт.
По этой же теме, трехсотка г-на Welch’a (при правильном соединении межкаскадного трансформатора)
работает с гораздо большей эффективностью анода, чем он представляет. Полагая, что его измеренное
значение Ер от анода до «земли» равно 420 V при напряжении автосмещения в 70 V, действительное
значение Еp=350V. Тогда при Iр =80mА, мощность на аноде равна 28 Вт. Это соответствует эффективности
анода в 45 %, что при 5 % искажений (12,5 Вт) является одним из высочайших значений эффективности,
реализуемых на 300В.
Из-за пары различий между старой схемой и представленной вновь, значения напряжений и токов,
указанных в схемах, отличаются друг от друга. Сначала я использовал кенотрон 5U4GB довольно старой
конструкции (года выпуска) и получил 470 V DC (выпрямленных) при подаче 450 V (переменного).
Новый кенотрон 5U4GB позволил поднять выпрямленное напряжение до 500 V, так что мне пришлось
включить последовательно резистор 100 Ом в цепь питания, чтобы сохранить нужные +470 V. Кроме того,
в прошлой 300В эмиссия была выше, чем у средней по характеристикам лампы и я получил
Iр = 90 mA при тех же Ер и резисторе в катоде (автосмещение). Значение Iр = 80 mA в новой схеме
ближе к стандартному значению. Если захотите, можете работать и без резистора 100 Ом в цепи
анодного питания, только следите, чтобы мощность рассеяния на аноде 300В не превышала предельно
допустимых 40 Вт.
References
1. JAES,Vol21,No4, pp267-273;Перепечатка в GA 4/92, стр. 16-19, I 23-26 и 42.
Other Preamp vs. Audio Interface Questions
There are a few other questions that roughly fit into this question, but get more specific. Let’s see if we can answer a few of those for you.
What Vocabulary Words Do You Need to Know?
Just like with other pieces of equipment, there’s a whole group of words that have a special meaning when related to audio interfaces. You’ll want to brush up on them before purchasing anything.
Latency is the lag between the actual sound and the playback in your headphones or speakers. This is similar to when the sound track to a television show or movie is off from the image reel, and you can hear everything a moment after it happens.

Drivers are what allow the audio interface to communicate with the computer.
48V phantom power is what you need when your microphone requires phantom power. You can buy special interfaces designed to work with microphones that require phantom power. If you have a dynamic microphone, this isn’t a problem for you.
Sample rate varies depending on the interface. The higher the sample rate, the higher the frequency that can be processed. Higher frequencies allow more filters and higher quality products.
Do You Need a Mic Preamp If You Have an Audio Interface with a Preamp?
You may not need a mic preamp if you have an audio interface. Mic preamps are common, as most recorders will agree microphones need a preamp. Some microphones come with an internal preamp installed, but others require you go buy one
However, audio interfaces also come with internal preamps. If you already have an audio interface with an internal preamp and you’re just beginning, that’s a great place to start. If you’re looking for a better sound than you’re currently getting with your interface, you may want to add a preamp closer to the source.
If you’re trying to choose between the two, microphones with preamps installed will record a better quality than audio interfaces with preamps installed.
This is because the preamp is closer to the source and able to capture it fully. By the time the acoustic waves hit the internal preamp in the audio interface, they’ve become more distorted than they are at the source, the microphone.
Межкаскадник можно и подешевле
Мне известно, что многих любителей смущает запредельная цена межкаскадного транса Tango NC-20,
который я использую. С этой целью я публикую информацию об альтернативных изделиях японского
происхождения.
Таким можно считать Tango NC-16. Если вы соедините параллельно обе первичные обмотки, он будет
держать ток 30 mА и импеданс первичной обмотки 2,6 кОм — вполне нормальный для 6F6 в триодном
включении. Вы можете также включить параллельно вторичные обмотки, при этом получить
трансформацию 1:2 и расширить диапазон. Можно их соединить последовательно и добиться увеличения
напряжения в 4 раза, но при этом диапазон станет несколько уже. Стоимость NC-16 вдвое меньше цены
NC-20.
Последние комментарии
08.11.2011 11:47 | ZeiGan
Вот я решил для себя схему подключения оборудывания на данный момент:
Гитара\Микрофон — ART Tube MP(ламповый предусилитель/Di Box, фантомное питание 48V) — Creative Audigy2 ZS(лин.вх) — Guitar Rig 5 (VST) — Сиквенсор Ableton.
Как видно все оборудование бюджетное, но думаю конфигурация оптимальная для начала.Т.к я использую ламповый преамп каторый усилит мой сигнал от гитары или микрофона, то от звуковой карты моей требуется в основном хороший АЦП/ЦАП и Creative Audigy2 ZS (24\96) я думаю справится.
14.11.2011 16:26 | Сергей
а какой микрофон?
02.01.2012 01:19 | Andy
2ZeiGan: расскажешь потом, как оно? достаточно ли бюджетной звуковой карты или захочется что-то другое приобрести?
17.04.2012 00:10 | Сергей
Хочу создать маленькую студию для записи дома игры на губной гармошке через микрофон. Имею:
1. Микрофон shure 57
2. Звуковую карту M-AUDIO FAST TRACK USB со встроенным преампом.
3. Есть еще преамп Ламповый ART TUBE MP PROJECT SERIES.
Как использование лампового преампа при последовательном подключении к карте повлияет на качество?
Можно ли в звуковой карте отключить преамп?
23.05.2012 10:53 | Димон
Выкинье вы свой ART TUBE на помойку.
01.02.2013 09:43 | много железа
Автор статьи- теоретик. Реальность жёстче. 70% звукового продукта для тв производится самодельщиками дома за копейки, на краденых плагинах. Звук тоже копеечный и потребитель такой-же. Крупному заказчику нужно дёшево, а не качественно. Я-бы запретил такого вида самообразовательные статьи, которые плодят кривоухих самопальщиков.
02.03.2013 19:05 | Дмитрий
Спасибо,очень полезная статья!
28.01.2014 04:49 | slavka
Спасибо за полезную статью.
17.02.2014 11:49 | Evgen
отличная статья!!!
17.02.2019 20:34 | Sergey
Очень круто! Молодцы
Analog or Digital — Options Galore
The ADI-2 Pro includes two servo-balanced analog inputs on combo XLR / TRS jacks, two separate balanced and unbalanced outputs on XLR and TS, two stereo Extreme Power headphone outputs on the front, an optical SPDIF I/O that also understands ADAT, and coaxial SPDIF (RCA) and AES I/O (XLR) via an included breakout cable. This universal set of I/O options offers superior quality and flexible connectivity to those who take a no-compromise approach to audio.
The USB 2.0 port is fully Class Compliant (UAC 2) for connection with compatible iOS devices, and is also used for firmware updates. Including an external switched power supply with lockable connector, the ADI-2 Pro can be easily powered from battery, opening up mobile applications as well as galvanically isolated use cases.
As a computer interface the ADI-2 Pro offers a stereo (2 in / 2 out) and a multichannel mode (6 in / 8 out). Compatibility with Mac OS X comes right out of the box. Under Windows the ADI-2 Pro uses RME’s MADIface series driver, for full WDM and ASIO compatibility and highest performance.
But What’s a Mixer?
Another common question of people first looking at the world of audio recording equipment is ‘what’s a mixer’? It’s often used audio interfaces, so it can be helpful to include when talking about interfaces and interfaces with preamps, especially if you already have a preamp and interface and want to take the next step in recording.
Some mixers have audio interfaces built in, and this can be a great option. While audio interfaces communicate between your recording equipment and computer, a mixer ‘mixes’ audio signals and combines them. If you combine the two, you cut out a step. Other than that, you don’t much need to worry about compatibility between mixer and audio interfaces.
5. Klirrton Grindstein
by: Audiority
![]()
https://youtube.com/watch?v=Q_Zj1zdM5pk
Precisely modelled in collaboration with Klirrton Manufaktur and producer Kristian Kohle from Kohlekeller Studio, the Grindstein is the official analog modelled simulation suite of their ultimate death metal preamp, along with the cutting edge Schnauze noise gate and the new Fleisch equalizer.
Dirty and fuzzy death metal tones from the 90s into the modern age, from a ripping chainsaw to a more modern and tight sound with just a touch of grind.
It can go from the Swedish HM2 sound all the way to 90’s Florida transistor distortion, but with modern fat low-end and tightness like never heard before!
Features
- Faithfully modelled on original hardware
- Two mixable channels (Bottomshaker and Chainsaw)
- Built-in boost based on Lichtbringer circuit
- Phase switch for out-of-phase supergrindy sound
- 3 band EQ on the Chainsaw channel and 2 band EQ on the Bottomshaker
- Noise Gate based on Schnauze circuit
- 5 band Fleisch EQ, with carefully selected boost and cut bands
- Cab simulator with 7 speaker combinations selected by Kris Kohle
System Requirements
Mac (Intel)
- OSX 10.8 or later (64-bit only)
- Intel i5 or higher
- 2GB RAM
- Screen resolution: 1024×768
- VST2, VST3, AU 64-bit host
- AAX 64-bit host (Pro Tools 11 or higher required)
Mac (M1 Apple Silicon)
- macOS 11.0 or later (64-bit only)
- Apple M1 or higher
- 2GB RAM
- Screen resolution: 1024×768
- VST2, VST3, AU 64-bit host
- AAX 64-bit host (Pro Tools 11 or higher required)
PC
- Windows 7 (64-bit only)
- Intel i5 or higher
- 2GB RAM
- Screen resolution: 1024×768
- VST2, VST3 64-bit host
- PT11 or higher, AAX 64-bit host
Important Note: This software is 64-bit only and will not function on 32-bit systems.
Buy
Reviews
Тонкости SE конструирования
![]()
1. Используйте выходные лампы с током в аноде большим, насколько возможно. Мне нравится
использовать 300В с анодным током около 100 mA, что придает звучанию большую телесность и богатый
бас. Однако, я особенно не усердствую, так как 100 mA являются почти предельным током для
трехсотки (при указанных напряжениях на аноде), а мне бы не хотелось сокращать жизнь
моих дорогостоящих 300В. Вместо них я использую модуляторный триод 801А с 90mA и Ер = 220 V и
межкаскадным трансформатором. Это позволяет мне выжать 7 Вт мощности.
Вы бы удивились звучанию, которое дает этот триод при питании низкое Ер/высокий Iр, в сравнении
с: обычно применяемым высокое Ер/ малый Iр. Когда лампа работает при отрицательных смещениях на
сетке с Iр = 30 и Ер = 600 V, возможно получить 3,8 Вт с вялыми серединой и басом, характерными высокими, которые я называю
«жестяными». Когда же я включаю в другом сочетании, звучание представляет собой сочетание лучших
качеств двух великих ламп, при том, что звучат они совершенно отлично друг от друга — триоды 45 и
50. У 45 — свежие, ясные высокие, у 50 — мощный бас. Звучание 801А трансформируется в то, что
я называю «супер 50».
2. Те же самые принципы применимы к лампам входных каскадов. Ничего необычного в том, что мой
усилитель может состоять из выходных ламп во всех каскадах, то есть 6BQ5 (ЕL84/6П14П) в триодном
включении по входу, 45-й триод в качестве драйвера, на выходе — модуляторный триод 800. Или так:
триод WE437A**** по входу, усилителем напряжения, 6L6GC в триодном включении — драйвером,
раскачивающим 805-й модуляторный триод. Это оттого, что указанные пампы работают с большими
токами. Если вы используете лампы, предназначенные для усиления напряжения, выбирайте те, у
которых выше крутизна, больше анодный ток и, как правило, низкое внутреннее сопротивление —
рецепт лампы с хорошей звуковой сигнатурой. Лампы, подобные 12АХ7/6Н2П, работающие при токе
менее 1 mA и Ri порядка нескольких десятков кОм, в моем выборе стоят последними.
3. Проектируйте свою схему таким образом, чтобы импеданс нагрузки на аноде был раз в 5,
предпочтительно в 10 раз, выше внутреннего сопротивления источника.
4. Внимательно отнеситесь к нормированному напряжению электролита, шунтирующего катодный
резистор, если вы считаете, что этот конденсатор ухудшает звук. Если конденсатор нормирован
на 16 V, то есть в десяток раз больше, чем напряжение смещения, то как раз это может быть
причиной ухудшения звука. Конденсатор хорошего качества с напряжением 6,3 V или 4 V
может решить вашу проблему.
5. Конденсатор может изменить звук в хорошую или плохую сторону в зависимости от применяемого
типа или вашего вкуса, вне зависимости от того, со смещением по постоянному напряжению он включен
или без оного. Испытайте и то и другое, выбирайте, что вам больше подходит. Типичный случай —
включение RIAA цепочки в корректоре, которую можно включить до и после разделительного
конденсатора.
6. При подходящем смещении постоянным напряжением хороший электролит может «звучать» так же,
даже лучше, чем пленочный конденсатор. Это означает, что вы можете использовать электролиты в
качестве переходных емкостей (разделительных, проходных), что сэкономит вам место и деньги, когда
требуется конденсатор довольно большой емкости, порядка 3-10мкФ. Следите, чтобы применяемые
конденсаторы имели очень маленькую утечку на постоянном напряжении.
7. Не применяйте маленьких емкостей для шунтирования больших электролитов, не выбрасывайте
денег на ветер.
8. Если вас не устраивает мощность усилителя на вашей прямонакальной лампе в SE включении,
попытайтесь реализовать SEPP (Single-Ended Push-Pull), используя межкаскадный трансформатор,
как фазоинвертор. На Фото 2 показаны мои последние усилия по созданию концепта SEPP
на 45-х триодах, с гипертрофированными выходными трансформаторами, так,что их пришлось
эвакуировать с основного шасси. Не требуйте от меня копий этой схемы, я пожалуй опубликую ее
в будущем, но не сейчас.
Concluding Remarks
Now you hopefully understand that the question “what is the difference between pre-amps and audio interfaces” is not a straightforward one because many audio interfaces actually contain pre-amps.
When you are starting your home recording journey I would say it is best investing first in a good quality audio interface with built-in pre-amp. This should give you a good enough sound quality to begin with and then as you progress and want to get more professional with your sound perhaps then take more of a look into pre-amps.
For a guide on the best audio interfaces for beginners please click here.
Perfect Sound Capture and Reproduction
Aiming for the absolute reference sound, any detail in the ADI-2 Pro is special and has its own story. The main PCB is an extraordinary 10 layer design with custom copper thickness, guaranteeing finest undisturbed sound as well as ample but separated power for the phones outputs. Internal power supply stages and precise regulators use a super-low-noise design to not degrade performance through the power rails. Selected SoundPlus operational amplifiers maintain highest SNR, lowest THD and high slew rate under all conditions. The whole analog circuit design is fully symmetrical and balanced throughout — and DC-coupled. The only capacitors in the signal path perform DC protection at the analog input sockets, and have been carefully selected to avoid any sonic impact.
The 4-channel AD-converter, supporting 786 kHz sample rate and DSD recording, is used in a dual mono design, with 3 dB improved signal to noise ratio. Two premium DACs are used for two separate stereo outputs. Internal audio processing like EQs, Crossfeed and spectral analysis, is done by a high performance DSP with 2.17 Giga FLOPS (2882 MIPS), delivering enough computing power to work even at 768 kHz sample rate.
For easy operation a high quality Sample Rate Converter has been added, switchable to the AES or SPDIF input, solving any clocking problem between those. And RME’s latest SteadyClock III technology ensures perfect jitter reduction and stable clocking, no matter if internal or external clocks are used.
Extreme Power Headphone Outputs
There is no use in boasting about -110 dB THD, when such values are not available in real world operation — for example when a 32 ohm headphone is connected. RME’s engineers therefore designed a new headphone output stage that brings the full performance of the premium DAC to the phone jack — even when using low impedance headphones. The Extreme Power design excels with 0.1 Ohm output impedance, a maximum output level of +22 dBu, and a maximum output power of 1.5 Watts — per channel! The two, fully separated stereo headphone outputs deliver the same 120 dBA SNR performance as the line outputs, for a full hum and noise free listening experience. THD is far below -100 dB (0.001%) even at full power, for the most clear and detailed soundstage possible. The Extreme Power design also incorporates current limiting, power surveillance, overload detection and DC protection. A low power mode and a high power mode are provided, for a perfect match from IEM up to planar.
Having two stereo outputs, balanced headphone operation is possible. As RME’s engineers were not satisfied with the existing techniques they developed a new Advanced Balanced mode for the ADI-2 Pro, that removes most limitations of standard balanced operation, and turns this mode into a a fully new experience. The exclusive Advanced Balanced mode delivers a balanced signal path from the DAC straight to the phone, with 3 dB gain in Signal to Noise Ratio, smoothed out deviations in components, optimized frequency response, super low output impedance (0.2 Ohms), and a maximum output level of +28 (twenty eight) dBu.
https://youtube.com/watch?v=bIx9tCc8gVM


